


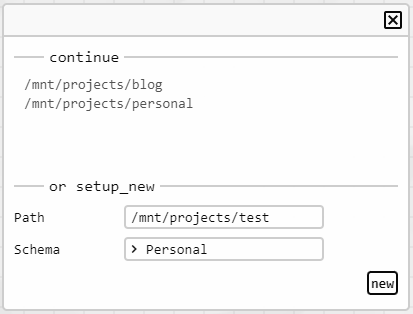
First, open the 'SiteMaker' on the Desktop, choose a path to store the project and a theme, then click Create.
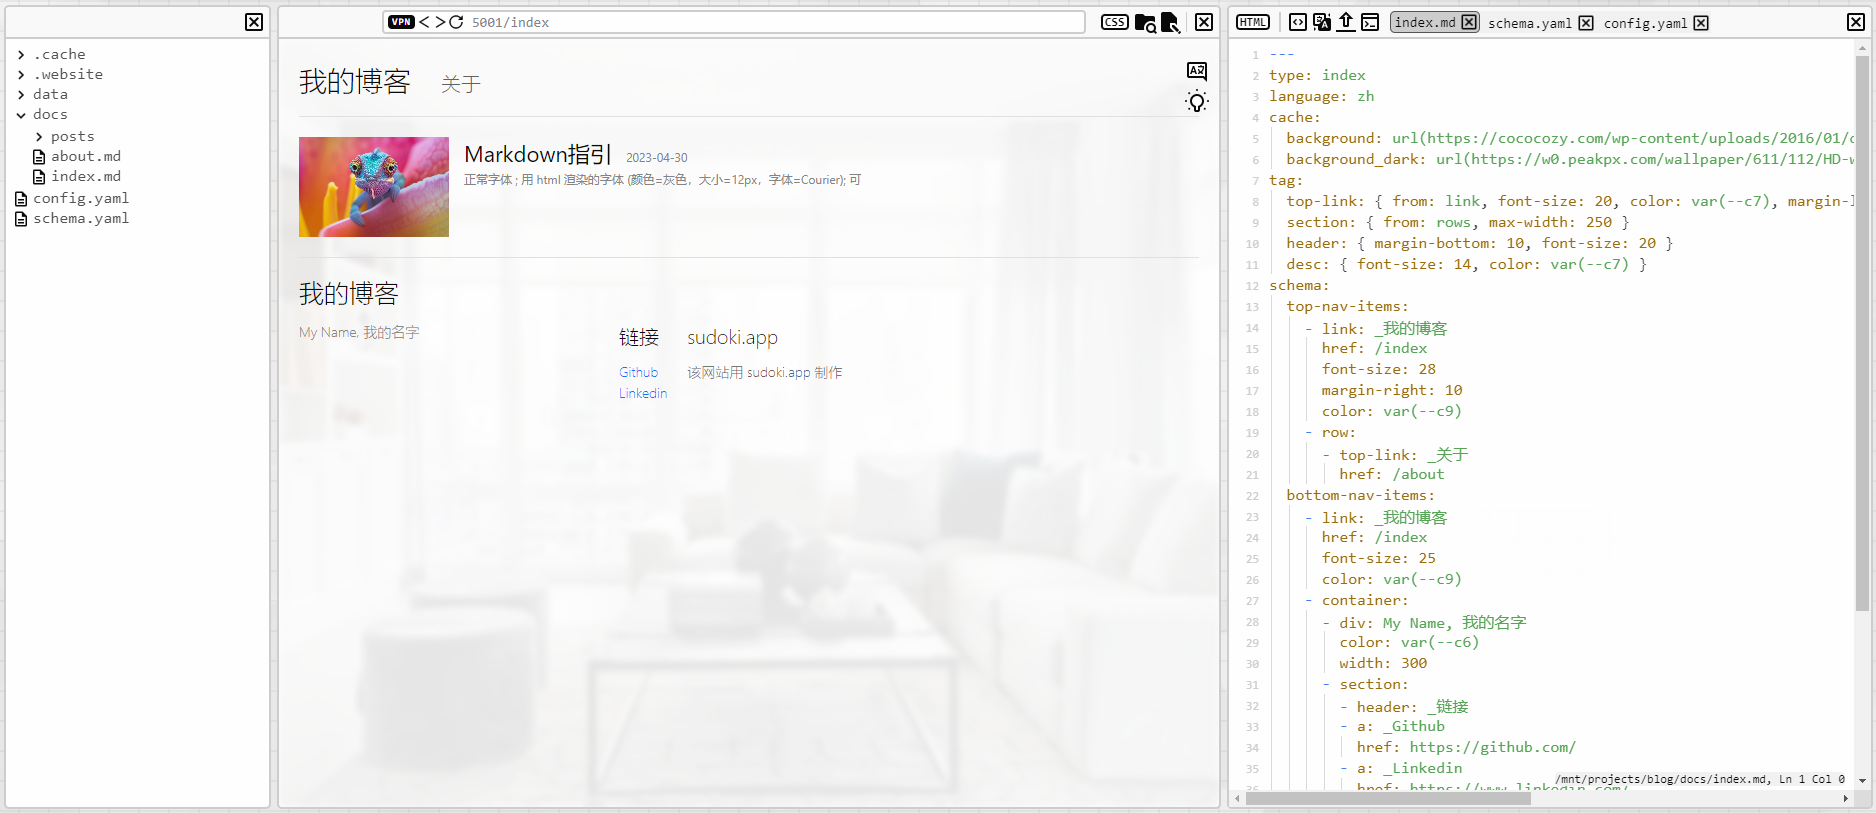
The "SiteMaker" has three windows, the left one is the file manager, the middle one is the website preview, and the right one is the file editor.
| 📁 .cache | Used by the backend to store cache and translation files |
| 📁 .website | Used by the backend to store generated html files |
| 📁 data | Stores standalone files like photos and videos |
| 📁 docs | Stores markdown files for user-editable page content |
| 📄 config.yaml | Project settings |
| 📄 schema.yaml | Site blueprint |
The root directory of 'SiteMaker' consists of 4 folders and 2 files.
Click  to generate the website, the entire generation process will involve the following steps:
schema.yaml to construct the Website Blueprintdocs/ and then populate the blueprint to generate Website Files.cache/, supplement to generate Website Files in other languagesGenerally speaking, the path of the file is the path where the file generates the webpage, for example:
docs/posts/0 => https://website.com/posts/0If the translation files for docs/posts/0 exist, such as in Japanese and English, then an additional 2 pages will be generated:
https://website.com/posts/0.ja (Japanese)https://website.com/posts/0.en (English)All generated files will be written to the .website/ folder
Click  to open the translation panel
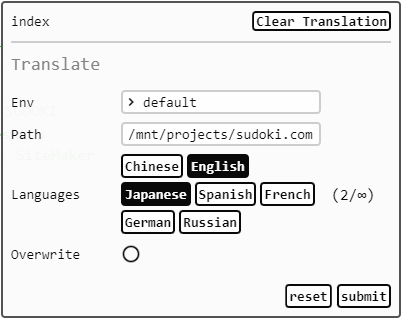
The translation will scan all files under docs/ and schema.yaml, and then translate them in batches, writing the results into .cache/
.cache/translation_en.json (All English translations).cache/translation_ja.json (All Japanese translations)Before translation, the large model API, such as OpenAI's gpt-4o-mini, should be configured in advance in /mnt/.system/envs.yaml:
  llm:
    gpt4o_mini_0718:
      type: openai
      model: gpt-4o-mini-2024-07-18
      api_key: xxx
If there are proper nouns or user-defined translations, you can write them under dict in docs/index.md:
---
type: index
language: zh
dict:
  any:
    SUDOKI: SUDOKI
    Desktop: Desktop
    SiteMaker: SiteMaker
  ja:
    SiteMaker: ウェブサイト工房
---
Click  to open the upload panel
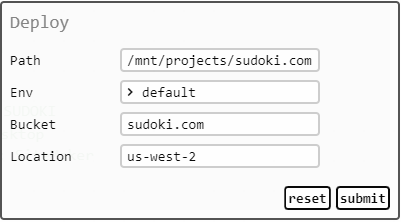
Before uploading, the S3 (any service provider) Storage Bucket should be configured in advance in /mnt/.system/envs.yaml:
object_storage:
  aws_s3:
    type: s3
    access_key_id: xxx
    secret_access_key: xxx
Before the upload starts, the 'SiteMaker' will configure the Storage Bucket for serving static websites. In the case of multiple uploads, only modified files will be uploaded.
Theoretically, files in .website/ can be directly deployed to Github Pages. For details, please refer to https://docs.github.com/en/pages/quickstart